この記事は Akerun Advent Calendar 2022 - Qiita の3日目の記事です。
WebエンジニアのBunです。主にiOSアプリの開発を担当しています。
日々いろんな解錠方法について考えています。特にiOSアプリで使えるいろんな便利な機能を使った解錠方法とその実装手順をまとめます。 今回はWidgetでの解錠について説明します。
Widgetとは
iOS13まではToday Extensionとして、ホーム画面を左にスワイプすると出てくる本体アプリのショートカット機能を提供するUIです。
iOS14からはWidgetKitとSwiftUIを使えば、iOS、iPadOS、macOS、watchOSで共通で利用できて、ホーム画面にも表示されるようになりました。 そして、iOS16からはiPhoneのロック画面や、watchOSのコンプリケーションにも表示できるようになりました。


https://support.apple.com/ja-jp/HT207122
Widgetは本体アプリと独立で表示されますが、groupキャッシュ領域を使えば本体アプリとデータを共有することが可能です。
Widgetから解錠
Akerunアプリの使用例として、合鍵をホーム画面あるいはロック画面に表示し、1Tapで解錠することが可能です。ホーム画面からアプリを探して起動し、また複数の合鍵から合鍵を探さなくて済みます。大分便利になります。
実装方法
UI実装
SwiftUIで実装する必要があります。
アプリにWidget ExtensionのTargetを追加

ホーム画面/ロック画面に表示するUIを実装(iOSの場合)
ホーム画面にはSmall、Medium、Largeの3種類サイズ、ロック画面にはInline、Circular、Rectangularの3種類サイズのWidgetが表示できます。
Widget表示サイズ種類を設定
@main
struct AkerunWidget: Widget {
    let kind: String = "AkerunWidget"

    var body: some WidgetConfiguration {
        IntentConfiguration(kind: kind, intent: ConfigurationIntent.self, provider: Provider()) { entry in
            AkerunWidgetEntryView(entry: entry)
        }
        // display name when add or edit widget
        .configurationDisplayName("Akerun")
        .description("ドアをウィジェットに追加すれば、素早く解錠することができます。")
        // ここにサポートするサイズの種類を設定
        .supportedFamilies([
            .accessoryCircular, .accessoryRectangular, .accessoryInline,
            .systemSmall, .systemMedium, .systemLarge, .systemExtraLarge
        ])
    }
}
ホーム画面に表示されるSmall、Medium、LargeのWidgetのUIを作成
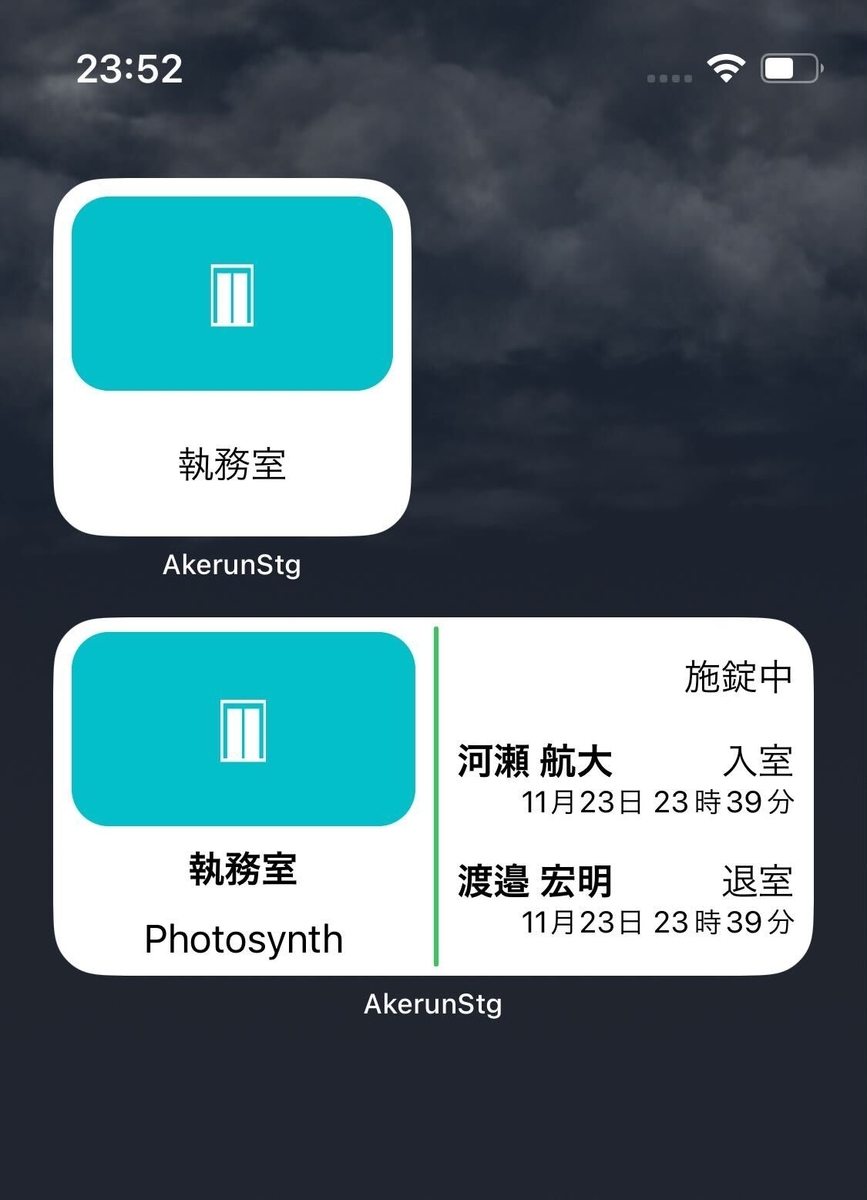
Smallサイズの場合、表示できる内容が限定されているので、シンプルに画像とドア名を表示し、Tapすると解錠できるようにします。 MediumとLargeはそれぞれSmallの2倍と4倍の表示領域があるので、Tapでの解錠だけではなく、入退室履歴を表示しても良さそうです。
以下はSmall時の表示実装になります。基本的にSwiftUIの各種StackでLayout調整すれば良いです。
struct DoorWidgetSmallView: View {
    var door: Door

    var body: some View {
        if #available(iOS 14.0, *) {
            VStack() {
                ZStack {
                    if let image = UIImage(contentsOfFile: door.imageUrlPath) {
                        Image(uiImage: image)
                            .resizable()
                            .frame(height: 84)
                            .cornerRadius(16)
                            .padding(.horizontal, 8)
                            .padding(.top, 8)
                            .aspectRatio(contentMode: .fit)
                    } else {
                        Image("door-image-entrance")
                            .resizable()
                            .frame(height: 84)
                            .cornerRadius(16)
                            .padding(.horizontal, 8)
                            .padding(.top, 8)
                            .aspectRatio(contentMode: .fit)
                    }
                }
                Spacer()
                VStack(alignment: .leading, spacing: 10) {
                    Text(door.name).font(.body)
                        .lineLimit(2)
                }
                .padding(.horizontal, 8)
                Spacer()
            }
            .widgetURL(URL(string: "akerunapp://widget/\(door.akerunId)"))
        } else {
            // Fallback on earlier versions
        }
    }
}
SmallとMediumのWidget表示は下記になります。
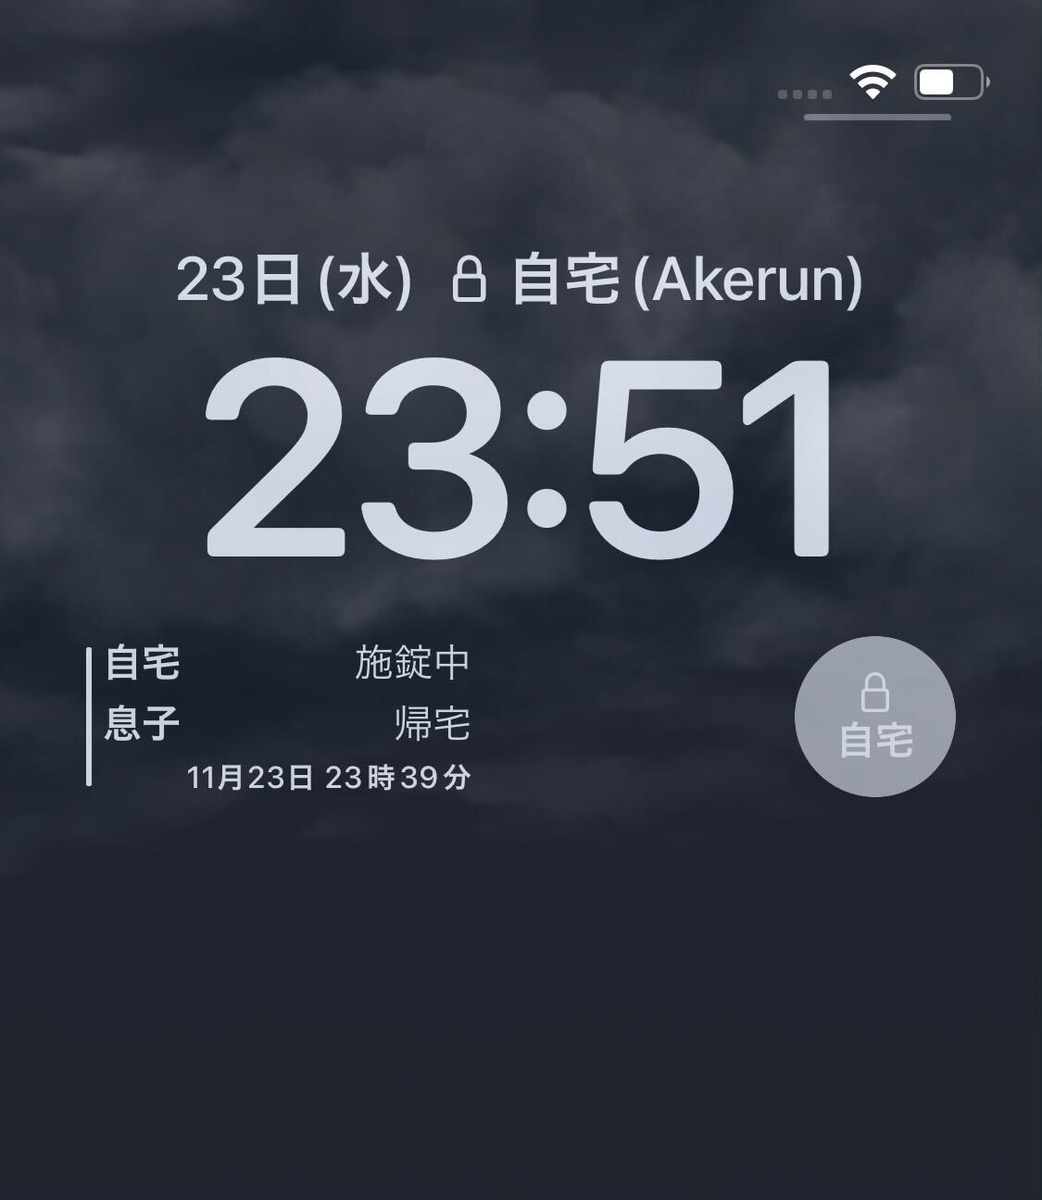
ロック画面に表示されるInline、Circular、RectangularのWidgetのUIを作成
Inlineは1行分の表示しかできないので、ドア名と状態(Icon)を表示します。 Circularは複数行表示できますが、Smallよりも小さいサイズになるので、2行でドア名と状態(Icon)を表示します。 ロック画面にCircularとRectangularを同時に表示できるので、Rectangularには最新の入退室履歴を表示します。
それぞれの実装は下記になります。
struct DoorWidgetInline: View {
    var body: some View {
        // 1行表示。Stackは反映されない
        HStack {
            Image(systemName: "lock")
                .resizable()
            Text("自宅(Akerun)")
                .font(.largeTitle)
                .multilineTextAlignment(.center)
        }
    }
}

struct DoorWidgetCircular: View {
    var body: some View {
        ZStack {
            Circle()
                .fill(Color.gray)
                .frame(width: .infinity)
            VStack {
                Image(systemName: "lock")
                Text("自宅")
                    .font(.headline)
                    .widgetAccentable()
            }
        }
    }
}

struct DoorWidgetRectangular: View {
    var door: Door
    var body: some View {
        HStack(spacing: 0) {
            VStack() {
                RoundedRectangle(cornerRadius: 0.75, style: .circular)
                    // 反映されない
//                    .fill(Color.green)
                    .frame(width: 2, height: .infinity)
            }
            .padding(.vertical, 4)
            VStack(alignment: .leading, spacing: 4) {
                HStack {
                    Text(door.name)
                        .font(.headline)
                        .widgetAccentable()
                    Spacer()
                    Text("施錠中")
                        .font(.body)
                        .widgetAccentable()
                }

                HStack {
                    Text(door.users.first ?? "")
                        .font(.headline)
                        .widgetAccentable()
                    Spacer()
                    Text("帰宅")
                        .font(.body)
                        .widgetAccentable()
                }

                HStack {
                    Spacer()
                    Text(Date.currentDateTime())
                        .font(.footnote)
                        .widgetAccentable()
                }
            }
            .padding(.horizontal, 4)
        }
    }
}
各種サイズのWidgetを表示
struct AkerunWidgetEntryView : View {
    // Viewの環境変数からどのサイズのWidgetを知ることができる
    @Environment(\.widgetFamily) var family: WidgetFamily

    var entry: Provider.Entry

    var body: some View {
        switch family {
        case .accessoryCircular:
            DoorWidgetCircular()
        case .accessoryRectangular:
            DoorWidgetRectangular(door: Door.homeDoor)
        case .accessoryInline:
            DoorWidgetInline()
        case .systemSmall:
            DoorWidgetSmallView(door: Door.tempDoor)
        case .systemMedium:
            DoorWidgetMediumView(door: Door.tempDoor)
        case .systemLarge:
            DoorWidgetLargeView(door1: Door.tempDoor, door2: Door.tempDoor2)
        case .systemExtraLarge:
            DoorWidgetExtraLargeView()
        @unknown default:
            fatalError()
        }
    }
}
Widget更新タイミング
下記のTimelineProviderでWidgetを追加する時、ホーム画面とロック画面表示するデータを取得します。
struct Provider: IntentTimelineProvider {
    // view生成する前に表示。データがない場合はダミーデータ表示?
    func placeholder(in context: Context) -> SimpleEntry {
        SimpleEntry(date: Date(), configuration: ConfigurationIntent(), relevance: nil, door: Door.tempDoor)
    }

    // 一時表示用(Widget Galleryでのサンプル表示など)。
    // UserDefaultsなどのキャッシュから最新データを表示(通信など時間かかる処理は非推奨)
    func getSnapshot(for configuration: ConfigurationIntent, in context: Context, completion: @escaping (SimpleEntry) -> ()) {
        let doors = self.getWidgetDoors()
        let entry = SimpleEntry(date: Date(), configuration: configuration, relevance: nil, door: doors.first ?? Door.emptyDoor)
        completion(entry)
    }

    // UserDefaults、Keychain、あるいはサーバーからデータを取得
    func getTimeline(for configuration: ConfigurationIntent, in context: Context, completion: @escaping (Timeline<Entry>) -> ()) {
        var entries: [SimpleEntry] = []

        let door = self.getSelectedDoor(from: configuration)
        let entry = SimpleEntry(date: Date(), configuration: configuration, relevance: nil, door: door ?? Door.emptyDoor)
        entries.append(entry)

        let timeline = Timeline(entries: entries, policy: .never)
        completion(timeline)
    }
}
まとめ
iOS14からWidgetが大分作りやすくなりました。
Widgetに表示されるデータの取得と更新タイミングさえ制御できれば、SwiftUIを使ってWidgetのUIをシンプルに作れます。
Widgetデータの更新タイミングの詳細、WidgetをTapする時の処理、そしてWidgetのカスタマイズ(IntentConfiguration)について、また別の機会で書こうと思います。
株式会社フォトシンスでは、一緒にプロダクトを成長させる様々なレイヤのエンジニアを募集しています。 hrmos.co
Akerun Proにご興味のある方はこちらから akerun.com